Accessories: Plus 1 Chair Installation
![]() Updated
by
Lectric eBikes
Updated
by
Lectric eBikes
Adventures are more fun with a pal! The Plus 1 Chair allows you to comfortably bring a plus one along for the ride with you.
The Plus 1 Chair must be used with a set of Cushions (sold separately); one Cushion for the back rest and one Cushion for the bottom. The Cushions are interchangeable and can be used with all other exclusive XPediton accessories. The Cushions are sold separately in a pack of 2 on our website- they are also included in the XPedition Essential Package.
Installing the Plus 1 Chair Frame:
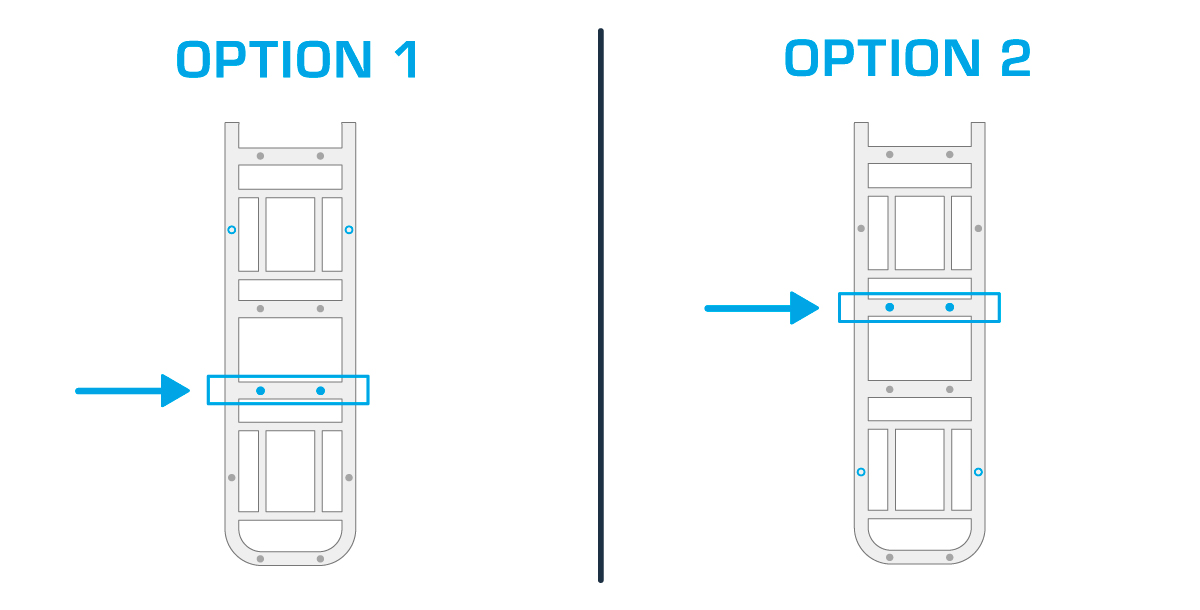
- The Lectric XPedition features two different mounting options for the Plus 1 Chair. Choose one of the two available installation positions on the rear rack. See image below:
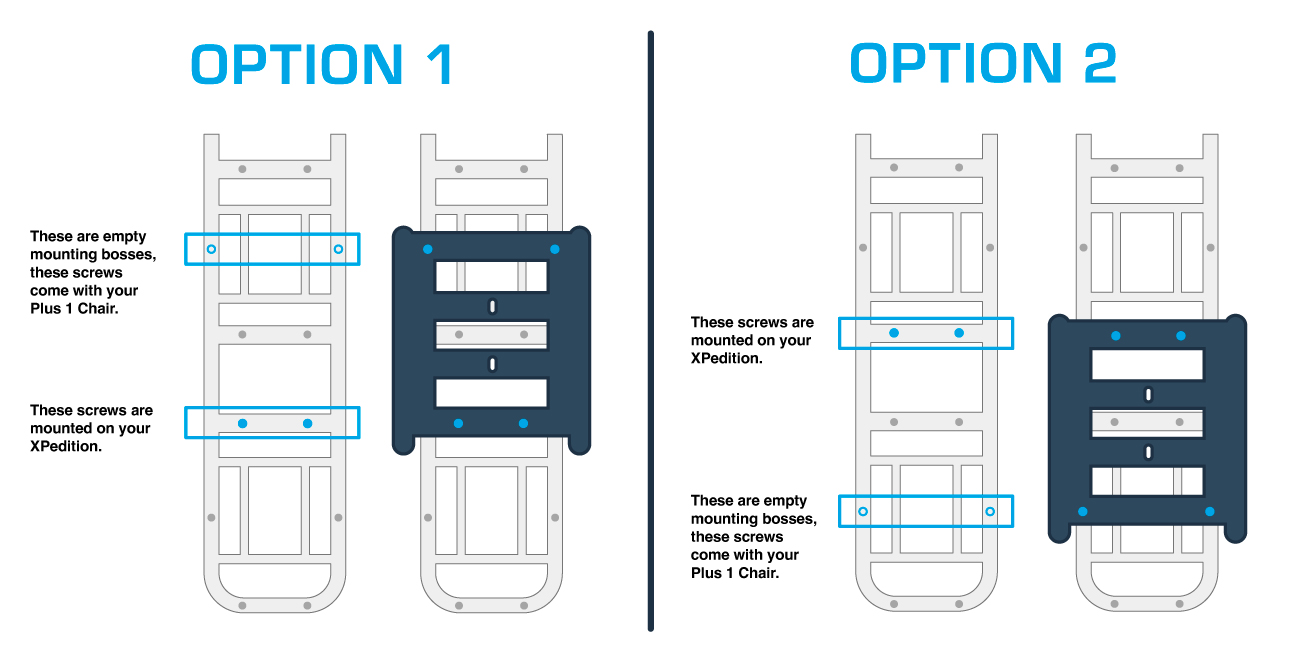
- Use a 4mm Allen Key to remove the two bolts within your selected installation position and set them aside. See image below:
- Align the bottom of the Plus 1 Frame over the 4 mounting bosses within your chosen installation position.
- Take the (2) 5mm bolts that came with the accessory and thread them through the outer bosses of the chair and the rear rack using a 5mm Allen Key.
- Then use a 10mm box wrench to thread the (2) 10mm Nyloc nuts onto the bottom of the excess bolts until tight.
- Use a 5mm Allen Key to re-install the 4mm bolts that were originally on the rear rack in the inner bosses within your chosen installation position. Thread until tight.
- Perform a pull test on the Plus 1 Chair to be sure it is secure on the rear rack. There should be no movement occurring in the pull test.
.
Installing the (2) Cushions on the Plus 1 Chair Frame:
- Flip both the Cushions upside down to expose their backsides.
- Unscrew the threaded knobs by turning them counterclockwise till they are completely removed.
- Next, remove the clamp plates from both cushions and set them aside.
- Begin by installing the cushion on the bottom:
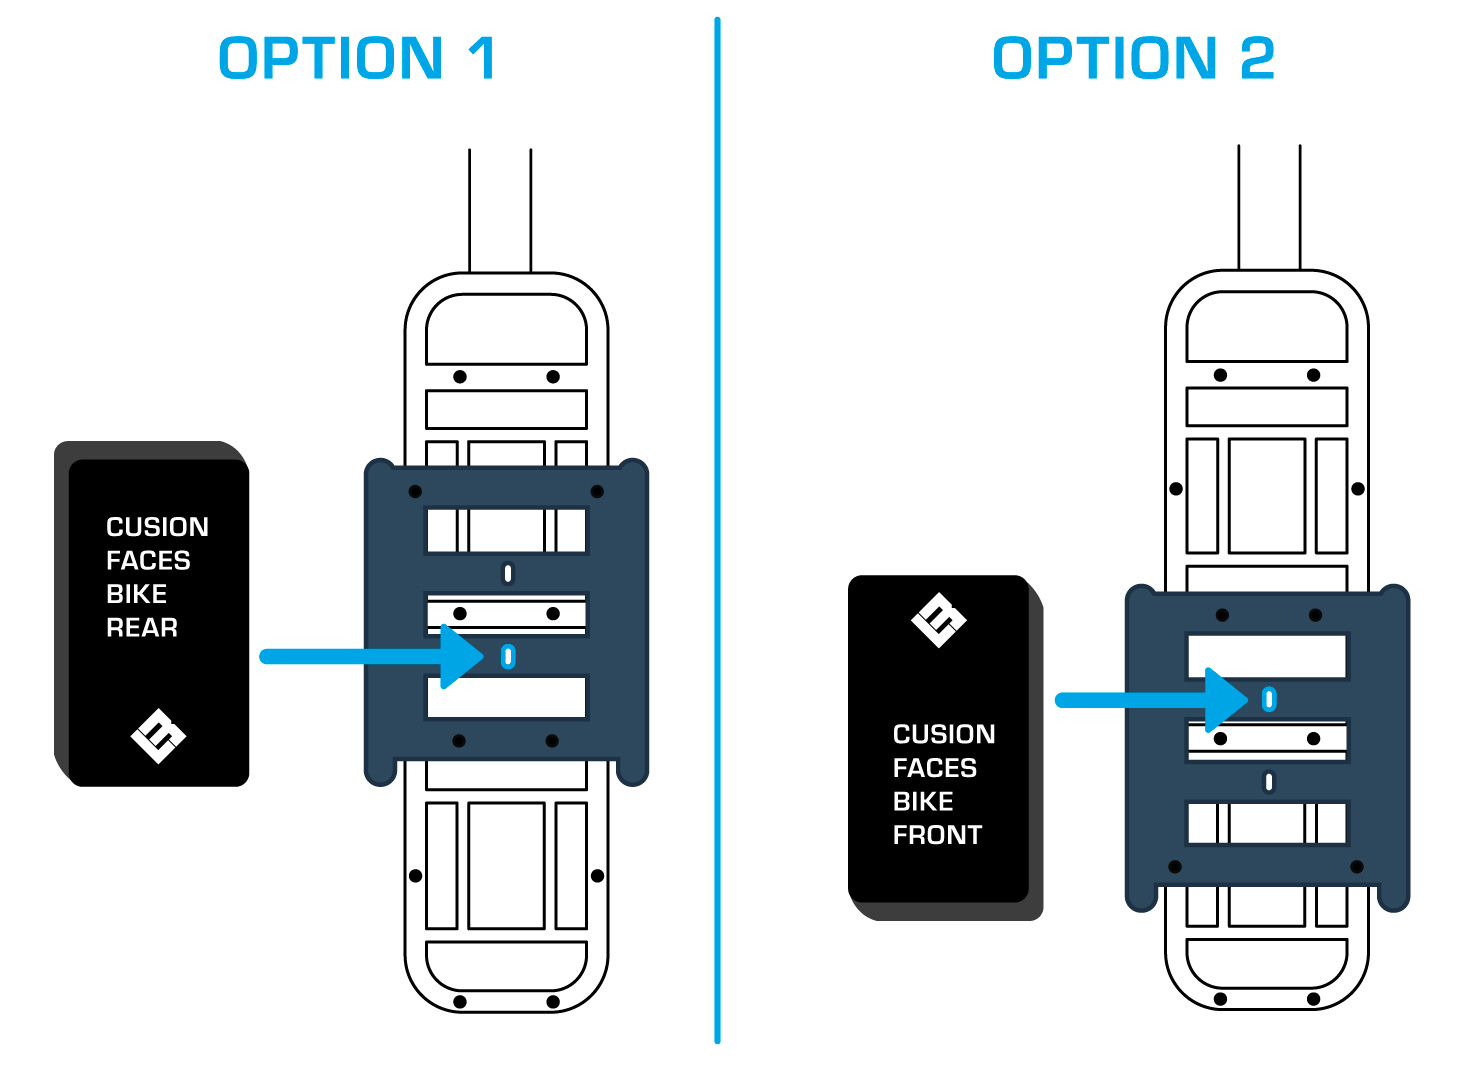
- For Option 1 (frame higher on the rack), Place the Cushion upright on the bottom portion of the Plus 1 frame, making sure the logo on the front of the cushion is facing toward the back of the bike. There are 2 slots that the protruding screw of the Cushion can go through, for Option 1, use the bottom slot. See image below.
- For Option 2 (frame lower on the rack), Place the Cushion upright on the bottom portion of the Plus 1 frame, making sure the logo on the front of the cushion is facing toward the front of the bike. There are 2 slots that the protruding screw of the Cushion can go through, for Option 2, use the top slot. See image below.
- Take one of the plates and place it under the Cushion and through the protruding screw. For the bottom cushion, this may be difficult; there is no place for the ridges of the plate to hook onto, instead, line it freely.
- Next, install the backrest cushion. Place the Cushion upright on the back portion of the Plus 1 frame, making sure the logo on the front of the cushion is facing toward the sky.
- Take the other plate and place it over through the protruding screw, hooking the ridges on the Plus 1 frame.
- Screw the threaded knob onto the excess screw by turning the knob clockwise until tight
- Perform a pull test to ensure both cushions and the Plus 1 frame are mounted properly before riding.
.
After installing the Plus 1 Chair AND the (2) Cushions, you are ready to ride with a plus 1!
We recommend adding Running Boards and a Barrow Bar to help make your passenger feel comfortable while accompanying you on adventures.
It is always the user’s responsibility to ensure the passenger and/or cargo loaded on the Lectric XPedition do not interfere or impact the user’s ability to safely operate the Lectric XPedition.
Please read the Lectric XPedition Owners Manual for more information.
Please read the Lectric XPedition Owners Manual for more information.
If you have any questions, please don't hesitate to contact our support team at contact@lectricebikes.com or (602) 715-0907.